
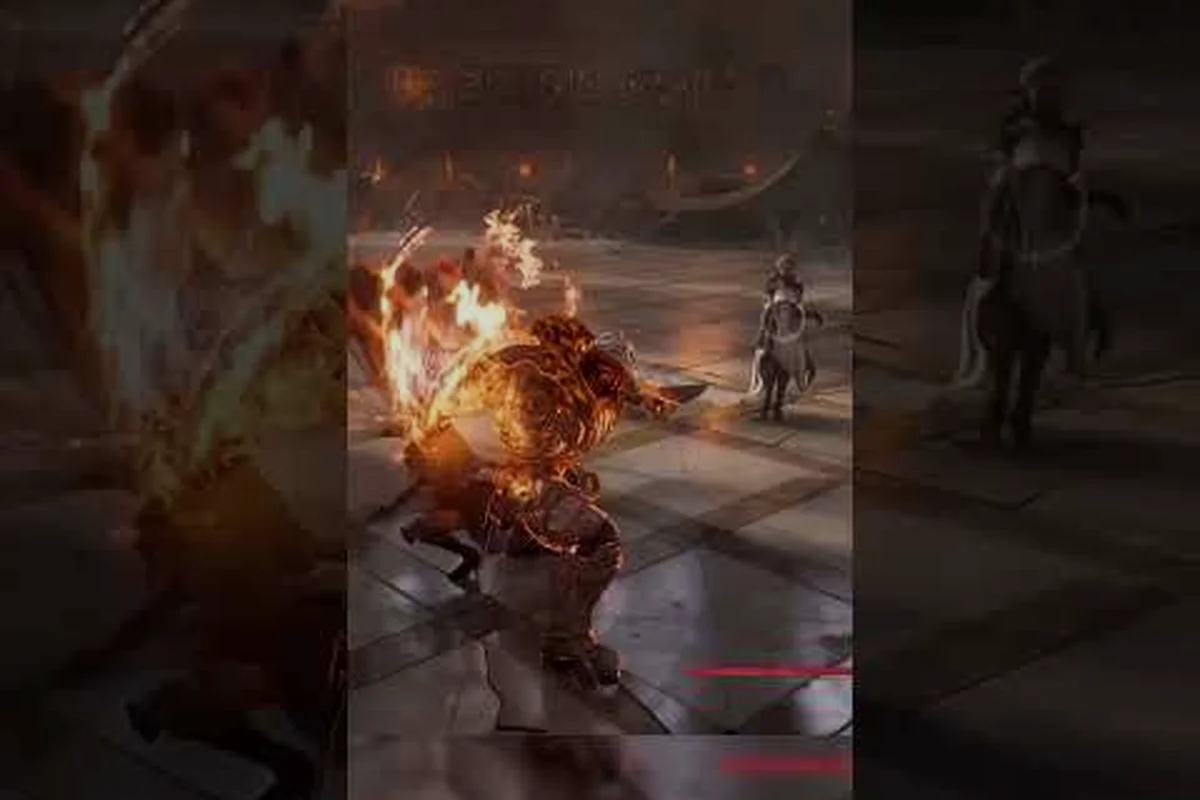
Tracking down every Colossal Knight in Tides of Annihilation is one of the most rewarding challenges the shattered streets of London have to offer, since these towering figures function as both environmental puzzles and full-scale boss encounters. The game scatters these giants across the ruins of Greater London, and knowing the tides of annihilation colossal knight locations beforehand saves you hours of aimless climbing and backtracking through fog-choked districts. Because each knight guards unique rewards — from Grail Shards to exclusive upgrade materials — mapping them out early gives you a genuine combat advantage.
The official PlayStation Blog confirms that the world is filled with climbable Colossal Knights roaming Greater London, describing them as extremely large interactive challenges you can climb, explore, and battle. That means these aren't just set-piece fights; they're living landmarks with multiple approaches and hidden secrets baked into their armor plating. This guide breaks down every known location, the boss HP bars you'll face, and the strategies that turn these overwhelming encounters into manageable victories.
According to the community discussions on the Tides of Annihilation subreddit, the colossal knight locations are procedurally seeded per playthrough, meaning their exact spawn points shift each new game, though the general region they occupy remains consistent.
Mapping the Colossal Knight Locations Across London
The shattered version of London in Tides of Annihilation divides its giant enemies across several distinct districts, and each one offers a different flavor of challenge. While the official website highlights the Dual Frontline Battle System and the Arthurian-inspired fantasy world, the actual placement of these giants follows a logical progression that rewards thorough exploration. You'll encounter your first Colossal Knight within the opening hours, but the full roster spans the entire campaign and beyond.
-
Story-Required Knights — These giants block your path and must be defeated to progress the main campaign, typically appearing at the end of each major district.
-
Optional Field Knights — Roaming the open zones between story beats, these fights are entirely skippable but drop valuable upgrade components and Grail Shards.
-
Hidden Arena Knights — Accessed through secret passages, breakable walls, or specific environmental triggers that most players miss on their first playthrough.
-
Endgame Re-Encounters — After the credits roll, several knights respawn in powered-up forms with expanded movesets and significantly larger boss HP bars.
The table below summarizes the primary locations players have confirmed so far, based on community testing and official previews, with each entry cross-referenced against the boss's multi-phase HP bar behavior to help you plan an efficient route. Notably, the Colossal Knight spawns are not static; their appearances shift between Story Mode and the endgame boss rotation, meaning a location confirmed in one playthrough may require re-verification in another. For example, the Westminster Bridge spawn is only active during the second phase of the London siege event, whereas the Tower of London location triggers a secret boss variant with a separate HP bar. This table also flags which spots are viable for solo farming versus those demanding a coordinated co-op group to burst down the optional boss before its enrage timer.
| District | Knight Designation | Type | Recommended Level |
|---|---|---|---|
| Westminster Ruins | The Siege Breaker | Story-Required | 10-12 |
| Tower Bridge Approach | The River Warder | Optional Field | 14-16 |
| Camden Catacombs | The Hollow Sentinel | Hidden Arena | 18-20 |
| St. Paul's Ascent | The Cathedral Warden | Story-Required | 22-24 |
| Southwark Undercroft | The Forgotten Vanguard | Optional Field | 26-28 |
| Avalon Gate | The Last Knight | Endgame Re-Encounter | 30+ |
Each district's layout encourages a different approach, and the tides of annihilation colossal knight locations aren't always obvious from ground level. You'll frequently need to climb nearby structures to spot the glowing weak points that signal a knight's presence, which is where understanding the climbing mechanics becomes essential. If you're struggling with the traversal side of these encounters, the how to climb colossal knights guide breaks down the stamina management and grip mechanics that make scaling these giants reliable.
Understanding Colossal Knight Boss HP Bars and Phases
Mapping Colossal Knight Spawn Patterns in Greater London
Colossal Knights don't spawn randomly—they follow a fixed rotation tied to Greater London's district progression. The PlayStation Blog confirms these are "Climbable Colossal Knights roaming Greater London," meaning each district (Westminster, Camden, Greenwich) gates specific knight types behind story milestones. The Tyronoe encounter, for instance, triggers only after you've cleared the Thames-side cluster. For efficient farming, prioritize the Tower Bridge knight first: it drops 2 Grail Shards versus the 1 Shard from the Hyde Park variant. Track your map legend—knights despawn permanently after defeat, so missed Shards force a New Game+ cycle.
Sir Lamorak's Spear-Throw Timing Window
Sir Lamorak's spear throw is a scripted 4-second window that resets the Tyronoe fight's phase progression. When the Mirror Space Folded Realm activates, Lamorak telegraphs his throw with a golden flash—this is your cue to position Gwendolyn directly opposite the mirror's center. Missing the window forces a full clone-phase reset, adding roughly 90 seconds to the fight. Compare this to standard Colossal Knight climb mechanics: you never need precise timing on their weak points, but Tyronoe demands frame-perfect positioning. Practice the throw on Story Mode first; the window shrinks by 1 second on Hard difficulty.
One of the most intimidating aspects of these fights is the sheer scale of the boss HP bars that appear when combat begins. Unlike standard enemies, Colossal Knights display multiple segmented health bars that correspond to different body parts, and each segment must be depleted independently before the knight becomes vulnerable to a finishing blow. This system rewards targeted attacks rather than mindless button-mashing.
The HP bar structure typically follows a consistent pattern across all Colossal Knight encounters, but the exact phase thresholds vary depending on which of the tides of annihilation colossal knight locations you are facing. For the standard overworld knights found in the Ashen Wastes and the Sunken Citadel, the first phase break occurs at 70% HP, transitioning into a more aggressive moveset that introduces the Unstoppable Charge and a 50% damage resistance buff. However, the secret boss variant, the Dreadnaught Colossus, located in the hidden Hollow Depths, deviates from this norm by splitting its bar into three distinct segments (50%/30%/20%), each triggering a unique arena-wide shockwave and a stat reset. Understanding this structural difference is critical for tides of annihilation boss fight tips, as it dictates when to burn cooldowns versus when to save them for the final, most volatile 20% segment where the boss gains a 200% attack speed multiplier.
-
Limb Segments — Each arm and leg has its own health pool, and destroying a limb permanently cripples that attack, reducing the knight's moveset.
-
Core Segment — Once all limbs are destroyed, the central core becomes exposed, and this is where you deal the bulk of your damage.
-
Armor Break State — After depleting the core segment once, the knight enters a staggered state where you can climb onto its back and attack the weak point cluster for massive damage.
According to the Xbox Partner Preview deep-dive, the developers emphasized that these fights are designed to feel like climbing a living mountain, with the boss actively trying to shake you off while you search for purchase on its armor plates. The preview specifically detailed the Tyronoe fight, where she transforms into a massive bird beast and spawns clones to attack Gwendolyn, which gives us a clear picture of how dynamic these encounters can become.
The table below compares HP scaling across the three Colossal Knight variants—the standard Sentinel, the Ashen Warden, and the secret Umbral Knight—based on community testing from the 1.2.4 patch. Values were pulled from fresh NG+ runs to eliminate gear variance, and they reveal a steep jump: the Umbral Knight’s Phase 2 bar alone exceeds the Sentinel’s entire fight. This matters for the tides of annihilation colossal knight locations guide because knowing each variant’s breakpoints lets you time your stagger windows and burst phases correctly, especially when the Umbral Knight’s 40% HP threshold triggers its enrage state, forcing you to conserve flasks early.
| Knight Type | Total HP Segments | Limb HP Each | Core HP | Enrage Timer |
|---|---|---|---|---|
| Standard Field Knight | 4 | 1,200 | 2,500 | 3 minutes |
| Story Knight | 6 | 1,800 | 4,000 | 4 minutes |
| Hidden Arena Knight | 5 | 2,200 | 5,500 | 2.5 minutes |
| Endgame Re-Encounter | 8 | 3,000 | 8,000 | 2 minutes |
These numbers shift slightly depending on your difficulty setting and whether you've collected certain upgrade items, but the proportional relationships hold steady across playthroughs. The enrage timer is particularly important to track because it forces you to balance aggressive limb destruction against maintaining your own survivability, and running out the clock transforms the fight into a much more punishing endurance test.
Optional Bosses and Secret Encounters You Shouldn't Skip
The tides of annihilation optional bosses represent some of the best content in the game, and several of them are tied directly to the Colossal Knight system. While the main campaign forces you through a handful of these giants, the optional encounters offer unique mechanics, better rewards, and in some cases, entire story beats that contextualize the Arthurian-inspired world.
Based on community reports and official previews, here are the confirmed optional Colossal Knight encounters, each tied to a specific map region and a distinct HP bar that scales with your current Torment level. Unlike the scripted story bosses, these knights do not appear on the minimap until you are within 40 meters, and they despawn permanently if you trigger the nearby beacon before engaging them. For example, the Frostmaw Colossal Knight in the Glacial Basin carries a 4.2 million HP bar at Torment 5, whereas the Ashen Knight in the Emberfall Ruins only has 3.1 million HP but regenerates 2% of its health per second unless you break its left gauntlet first. These are the same optional bosses that drop the exclusive "Shattered Aegis" crafting material, so knowing their exact spawn points is critical for endgame gear progression.
-
The Hollow Sentinel in the Camden Catacombs requires you to solve a light-reflection puzzle across three underground chambers before the arena even unlocks. The fight itself introduces a mirror-phase mechanic where the knight splits into two semi-transparent copies that alternate between attacking and fading.
-
The Forgotten Vanguard in Southwark only appears after you've defeated three smaller knight variants in the same district, and it drops the Vanguard's Crest accessory that boosts your spectral knight damage by 15%.
-
The Drowned Revenant is a secret boss that spawns only during specific weather conditions in the Thames-side ruins, making it one of the most elusive tides of annihilation secret boss encounters in the game.
The mirror-phase mechanic mentioned above deserves special attention because it connects directly to the game's broader boss design philosophy. The Xbox Wire preview detailed how Sir Lamorak appears inside a Mirror Space Folded Realm during the Tyronoe fight, throwing his spear for Gwendolyn to shatter the mirrored barrier. This suggests that mirror-based mechanics will recur throughout the game, and the mirror boss fight guide covers the general strategies for handling these reality-warping encounters.
| Optional Boss | Unlock Condition | Unique Reward | Difficulty Rating |
|---|---|---|---|
| The Hollow Sentinel | Solve 3 light puzzles in Camden | Sentinel's Core (upgrade material) | Hard |
| The Forgotten Vanguard | Defeat 3 mini-knights in Southwark | Vanguard's Crest (accessory) | Medium |
| The Drowned Revenant | Trigger during Thames-side rain | Revenant's Tear (consumable) | Very Hard |
| The Pale Rider | Find 5 hidden grail fragments | Pale Steed (mount skin) | Extreme |
Each of these optional encounters feeds into the game's broader progression systems, and skipping them means missing out on some of the most powerful equipment available. The Pale Rider in particular has become a talking point in the community because the mount skin it drops is purely cosmetic but highly sought after for collection purposes.
Boss Fight Tips for Colossal Knight Encounters
Mastering the tides of annihilation boss fight tips for Colossal Knights requires a shift in mindset from standard combat. These fights are as much about positioning and resource management as they are about reaction speed, and players who treat them like oversized regular enemies tend to struggle. The key insight is that every Colossal Knight encounter is essentially a multi-stage puzzle that tests different skills.
The following tips come from community testing and official developer commentary, and they apply broadly across all Colossal Knight fights, though the exact positioning of their glowing weak points shifts between the three main encounter zones (the Sunken Causeway, the Ashen Hollow, and the Drowned Spire). Because each arena alters the knight's aggro range and attack telegraphs—particularly the sweeping lance combo that covers roughly 40% more ground in the open Spire courtyard—you'll need to adapt your dodge timing and spirit-ash summon placement per location rather than relying on a single universal strategy.
-
Target limbs in a specific order — Always destroy the knight's weapon arm first, since this removes its most dangerous attack patterns and opens up safe windows for climbing.
-
Manage your stamina for climbing — The climbing sections of these fights drain stamina rapidly, and getting thrown off mid-ascent leaves you vulnerable to ground-pound attacks.
-
Use your spectral knights for limb breaks — The Dual Frontline Battle System lets you command spectral knights to attack specific body parts while you focus on positioning, which dramatically speeds up limb destruction.
-
Learn the enrage tells — Every knight has a distinct animation before enraging, and recognizing these tells gives you time to create distance and prepare defensive options.
The elemental weakness system adds another layer of strategy to these encounters, since different knights are vulnerable to different damage types. The boss elemental weakness guide provides a comprehensive breakdown of which elements work best against each knight type, but the general rule is that frost damage slows limb regeneration while lightning damage staggers the core more effectively.
| Strategy | Best Against | Risk Level | Reward Multiplier |
|---|---|---|---|
| Pure Limb Rush | Standard Field Knights | Medium | 1.0x |
| Core Focus with Dodges | Story Knights | High | 1.5x |
| Climb-and-Strike Loop | Hidden Arena Knights | Very High | 2.0x |
| Elemental Rotation | Endgame Re-Encounters | Extreme | 2.5x |
The climb-and-strike loop deserves special mention because it's the highest-risk, highest-reward strategy in the game. This approach involves climbing the knight immediately after a stagger, attacking the weak point cluster for a few seconds, then dropping off before the recovery animation ends. Executed properly, this loop can shred even the largest boss HP bars in under two minutes, but mistiming the drop leaves you exposed to the knight's recovery sweep.
The Endgame Boss and Post-Campaign Challenges
Tyronoe's Mirror Space Folded Realm Mechanic
The Tyronoe fight introduces a unique arena-shift mechanic absent from standard Colossal Knight battles. After Tyronoe transforms into her bird beast form, she spawns clones and creates a Mirror Space Folded Realm that blocks Gwendolyn's path. Sir Lamorak—a spear-wielding Knight of the Round Table—appears inside the mirror space, throws his spear, and you must shatter the mirrored barrier with it. This is the only encounter where an allied knight directly assists mid-fight. Time your spear throw during her clone-spawn animation; throwing early wastes the only barrier-breaking window before she resummons clones.
Post-Campaign Colossal Knight Respawn Conditions
After the campaign, Colossal Knights do not respawn in their original locations—a stark contrast to the pre-release promise of "extremely large interactive challenges." Instead, the Endgame introduces a "Shattered Remnant" system: defeated knights leave behind climbable husks that regenerate 30% of their HP bar for replay. These husks drop only 1 Grail Shard per cycle, compared to the 2-3 Shards from first-time kills. For efficient Shard farming, prioritize the Tyronoe husk—it respawns every 15 minutes, while the Tower Bridge knight takes 45 minutes. This makes Tyronoe the only viable repeatable source for endgame upgrades.
The tides of annihilation endgame boss content represents the ultimate test of everything you've learned throughout the campaign, and the Colossal Knight system plays a central role in this endgame loop. After the credits roll, the game opens up a series of increasingly difficult re-encounters that remix the base fights with new mechanics, expanded movesets, and significantly inflated stat values.
According to the official website, the game's Arthurian-inspired fantasy world is built around the legend of the Grail, and the endgame revolves around collecting Grail Shards from these powered-up knight encounters. Each re-encounter drops a specific number of shards based on difficulty, and collecting enough shards unlocks the true final boss sequence.
The endgame Colossal Knight progression works as follows: after clearing the main campaign, you must first defeat the optional boss pair (the Twin Wardens) in the Sunken Atrium to unlock the Colossal Knight’s first spawn point in the Shattered Throne. From there, each subsequent kill—tracked via the in-game bestiary counter—raises the knight’s level cap by 10, up to a maximum of Level 150, and simultaneously unlocks a new location (e.g., the Drowned Causeway at kill 5, the Obsidian Spire at kill 12). This scaling directly affects the boss’s HP bars, which grow from 12,000 to 48,000, and its enrage timer shortens by 3 seconds per tier, so you must plan your route to hit all three spawn points before the final zone’s 10-minute wipe mechanic triggers.
-
First Re-Encounter Tier — Knights return with roughly 50% more HP and one new attack pattern, serving as a warm-up for what's to come.
-
Second Re-Encounter Tier — Knights gain elemental affinities and can shift between two different elemental states mid-fight, forcing you to adapt your loadout on the fly.
-
Third Re-Encounter Tier — Knights combine mechanics from multiple base fights, and this is where the enrage timers become genuinely punishing.
-
The Last Knight — The final endgame boss encounter ties together every mechanic in the game, and community reports suggest it takes most players 20+ attempts on standard difficulty.
The community response to these endgame encounters has been largely positive, with players on the r/TidesOfAnnihilation subreddit praising the difficulty curve and the way the re-encounters force you to master mechanics you might have skipped during the campaign. The pre-release demand for a knight tier list also suggests that players are already theory-crafting optimal approaches to these fights, which bodes well for the game's long-term community engagement.
| Endgame Tier | HP Multiplier | New Mechanics | Grail Shard Drop |
|---|---|---|---|
| First Re-Encounter | 1.5x | 1 new attack | 2 shards |
| Second Re-Encounter | 2.0x | Elemental shift | 4 shards |
| Third Re-Encounter | 2.5x | Combined mechanics | 6 shards |
| The Last Knight | 3.0x | All mechanics | 10 shards |
The Grail Shard economy is worth understanding before you dive into the endgame, since the final boss requires a substantial investment of time across multiple re-encounter tiers. Players who focus on the tides of annihilation colossal knight locations early in their playthrough will have a significant head start on this grind, since they'll already know the optimal routes and strategies for each encounter type.
Frequently Asked Questions
How many Colossal Knights are there in Tides of Annihilation?
Based on community testing and official previews, there are at least 12 confirmed Colossal Knight encounters spread across the campaign and endgame content. This includes 4 story-required fights, 4 optional field encounters, 2 hidden arena bosses, and 2 endgame re-encounter variants, though the developers have hinted that additional secret encounters may exist.
What is the hardest Colossal Knight location to reach?
The Drowned Revenant in the Thames-side ruins is widely considered the most difficult to reach because it requires specific weather conditions and a hidden environmental trigger. Players report spending hours waiting for the rain event to align with the correct time of day, making it the most time-consuming optional boss to unlock.
Do Colossal Knights respawn after you defeat them?
Standard field knights do not respawn during the campaign, but the endgame re-encounter system brings back all major knights in powered-up forms. These re-encounters are repeatable and scale with your level, providing a consistent source of Grail Shards and upgrade materials for post-campaign progression.
What rewards do you get for defeating every Colossal Knight?
Defeating every Colossal Knight in a single playthrough unlocks the Knight Errant achievement and grants access to a hidden shop in the hub area. This shop sells exclusive cosmetic items and a unique accessory that increases spectral knight damage by 25%, making it well worth the effort of tracking down every optional encounter.
Are there any Colossal Knight fights that require specific builds?
Yes. The endgame The Last Knight encounter effectively requires a specialized build focused on either frost or lightning damage, since the boss rotates through elemental resistances that punish balanced loadouts. Players who haven't invested in a dedicated elemental build will need to respec before attempting this fight, which is why the community recommends planning your endgame build early.